


Ultimate Badge JoJo’s Bizarre Adventure: Golden Spirit Guide, How to Get Stronger!
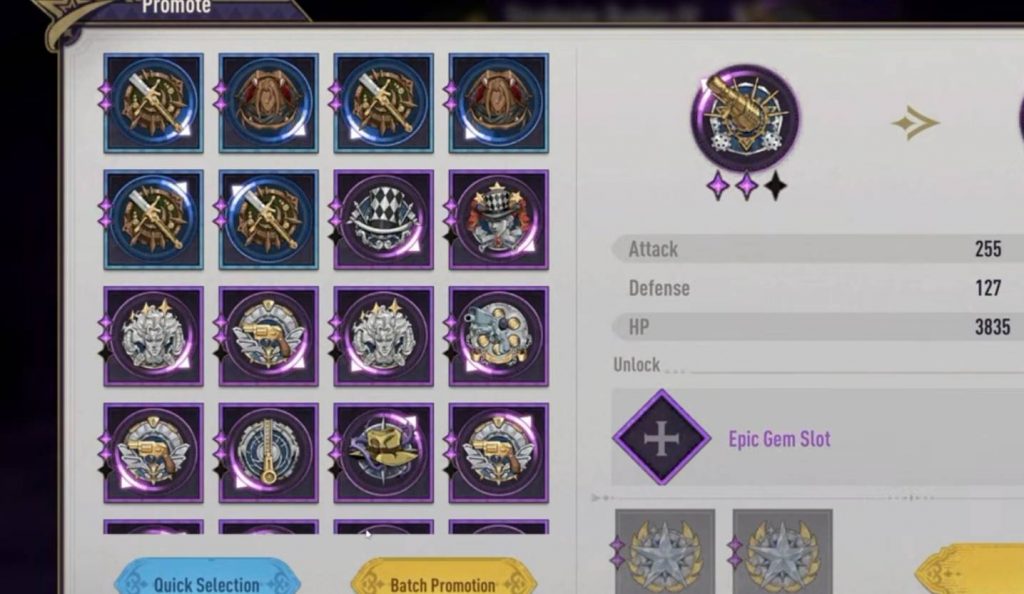
Badges are one of the most important progression systems in JoJo Golden Spirit. The right badge setup can improve a character’s HP, Attack, Defense, Critical Rate, Attack Speed, healing, shielding, and other useful effects. Because of this, understanding how badges work can make a big difference when building your team.
The badge system can look confusing at first because there are different directions, star levels, set effects, gems, promotions, and character roles to consider. This guide breaks everything down, including badge promotion, gem combinations, and the best badge options for melee DPS, ranged DPS, supports, tanks, and PvP.
Understanding Badge Directions and Stats
Every badge has basic stats that depend on its star level, but the direction of the badge determines which stat receives the highest priority. There are four directions: Top Left, Top Right, Bottom Left, and Bottom Right. The set itself does not change these basic stat priorities.
The main stat priorities are:
- Top Left: Highest HP priority.
- Top Right: Highest Attack priority.
- Bottom Left: Highest Defense priority.
- Bottom Right: Second-highest overall stat priority.
This becomes important when you are deciding which badges to promote or use when crafting higher-level gear. If you want to focus on Attack, Top Right should generally be your first choice, followed by Bottom Right. For HP, prioritize Top Left and then Bottom Right. For Defense, Bottom Left is the main option, followed by Bottom Right.
Understanding these directions early can save a lot of resources because you will know which badges are worth keeping instead of upgrading everything randomly.
How Badge Promotion Works
Badge promotion requires duplicate badges. To start promoting an Epic or Legendary badge, you need another copy of the exact same badge, including its set and direction.
Once you have the correct duplicate, you can promote the badge. Promotion increases its stats and unlocks an additional perk. Depending on the badge, this bonus can increase Attack, HP, Defense, or a combination of different stats.
The important thing to remember is that a higher-star badge can sometimes be better than a stronger set that has a lower star level. A two-star badge can outperform a one-star badge from a better set simply because of the additional stats gained through promotion.
For that reason, don’t judge a badge only by its set effect. Always look at its star level and overall stats.
How to Make 3-Star Badges
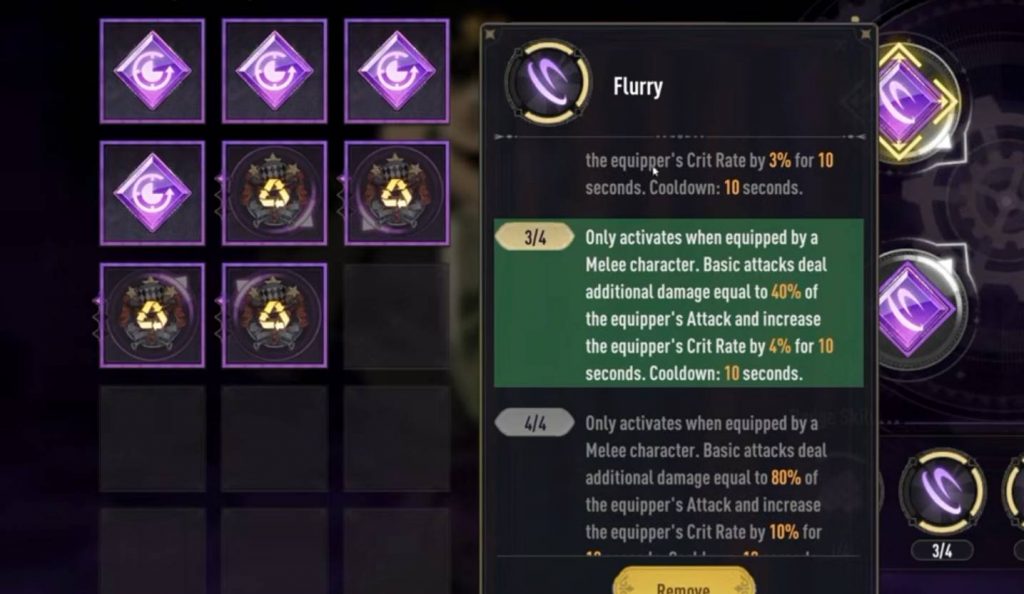
After reaching two stars, you can continue promoting your badge to three stars by using additional two-star badges as materials. These materials do not necessarily need to be two-star Epic badges. You can also use promoted blue badges. This makes blue badges an important resource when you are working toward higher-star equipment.
The easiest way to handle this is by using the Badge Promotion feature:
- Open the Badge Promotion menu.
- Select the blue badges you do not need.
- Use Select All if you want to process them together.
- Start the promotion.
- Repeat the process using the newly promoted badges.
- Continue until there are no more badges available for promotion.
This lets the game automatically combine the appropriate badges and saves you from manually fusing every single badge.
However, be careful with the final materials. Three-star badges unlock an Epic Gem Slot, which can completely change how you build a character.
What Is an Epic Gem Slot?
An Epic Gem Slot allows you to combine the effects of two different badge sets on the same character. This is one of the most useful parts of the badge system because you do not have to rely on a single set effect.
For example, you could use a Frenzy badge as your main set and then add gems from another set to gain an additional effect. This allows you to create combinations such as:
- Frenzy set + Kenzo gems.
- Kenzo set + Frenzy gems.
- Kenzo set + Akira gems.
- Kenzo set + Anubis gems.
To create gems, you need to dismantle badges from the set you want to convert. Because of this, it is usually better to use a lower-star badge for gem conversion when possible.
Do not destroy valuable high-star badges just to create gems unless you are certain about the build you want.
Prioritize DPS Sets First
If your resources are limited, DPS badges are usually worth prioritizing before support or tank sets. Increasing damage can make farming, Story progression, and other PvE content much faster.
However, the best DPS badge depends on the character. You should first look at where the character gets most of their damage.
For melee DPS, some of the important sets include:
- Kenzo: Increases Critical Rate.
- Akira: Increases Critical Damage.
- Anubis: Increases Attack Speed.
- Wrangler: Improves certain Ultimate-related damage or effects.
- Bucciarati: Reduces enemy Energy and can be useful in specific situations, especially PvP.
Best Badges for Melee DPS
Kenzo is one of the safest choices for most melee DPS characters because Critical Rate can be difficult to obtain from other sources. More Critical Rate makes the character’s damage more consistent.
Akira can provide a much larger damage increase when the character already has enough Critical Rate. However, Critical Damage becomes less useful when your character rarely lands critical hits.
Because of this, some useful combinations include:
- Kenzo set + Anubis gems
- Kenzo set + Akira gems
- Akira set + Kenzo gems
Kenzo and Anubis work especially well together because Critical Rate and Attack Speed complement each other. Akira becomes more attractive once your character already has a decent amount of Critical Rate.
Wrangler is more situational and should mainly be considered for characters that gain a large portion of their damage or utility from their Ultimate.
How to Tell if a Character Is Melee or Ranged
You do not have to guess whether a character is melee or ranged. You can check the character’s attack range number.
If the number is 1, the character is considered melee.
If the number is higher than 1, such as 10, the character is considered ranged.
This is useful when deciding which badge sets should be considered for a particular character.
How to Get Gold Badges
Gold badges require two matching three-star badges. This means the process takes a large number of lower-level badges.
The basic process is:
- Combine badges until you have a three-star badge.
- Create another three-star badge with the same type.
- Combine the two three-star badges.
- The result is a Gold badge.
- Gold badges unlock additional effects and stronger bonuses.
One three-star badge requires roughly eight base badges, so creating a Gold badge requires a significant amount of materials.
Because of this, do not rush into making Gold badges unless you are confident that the set will remain useful for your character.
Ranged DPS Badge Guide
Ranged DPS is more complicated because different characters can rely on completely different damage sources.
The first thing you should check is the character’s skill description. If the character repeatedly mentions Basic Attacks or has abilities that increase Basic Attack damage, a Basic Attack-focused badge is usually the better option.
If the character gets most of their damage from Skills or Ultimate abilities, you should instead consider a Skill-focused setup.
This simple rule can help you avoid putting a strong badge on a character that cannot properly take advantage of its effect.
Hol Horse and Basic Attack Builds
Hol Horse is one of the strongest choices for ranged characters that rely heavily on Basic Attacks.
Characters such as Hol Horse, FF, and Caesar can benefit from this type of setup because their kits can make strong use of Basic Attack damage.
When checking whether a character should use a Basic Attack set, look for things such as:
- Basic Attack damage increases.
- Skills that improve Basic Attacks.
- Abilities that count as Basic Attacks.
- A kit where Basic Attacks make up a large part of total damage.
If these mechanics appear frequently in the character’s kit, a Basic Attack set should be considered.
Ranged Badges for World Boss and Guild Boss
World Boss and Guild Boss work differently from normal enemies because they cannot simply be defeated like regular opponents. Instead, the goal is usually to push your damage or score as high as possible.
These enemies are treated as being at full HP for certain badge effects. Because of this, badges that depend on reducing the enemy’s HP can lose some of their value.
For example, Mr. Badge and Joseph Badge can struggle to provide their full damage potential against content where the enemy cannot actually be killed.
For this type of content, Hol Horse and Jong Galli A are strong options to consider.
Possible combinations include:
- Hol Horse set + Jong Galli A gems.
- Jong Galli A set + Hol Horse gems.
Which one should be the main set depends on the badges you already own and their star levels. A higher-star badge can provide better base statistics even when the other set has a more attractive effect.
Ranged Badges for Story and Normal PvE
Story content gives you more freedom when building ranged DPS characters. You do not necessarily have to use the same setup that you would use against World Boss.
If your character focuses on Basic Attacks, use a Basic Attack-oriented setup. If the character deals most of their damage through Skills or Ultimate abilities, build around those instead.
Mr. Badge can be useful in content where enemies can actually be defeated because its conditions can work more naturally in normal fights.
For example, a character such as Kyoraku gets a large amount of damage from his Ultimate and Skill abilities, making a Skill-oriented build more appropriate than a pure Basic Attack setup.
Skill and Ultimate Damage
One important detail is that badge effects referring to Skills can apply to both Skill and Ultimate damage. This means you should not automatically assume that an Ultimate is excluded from a Skill-related effect.
When building a character, look at their complete kit instead of focusing on only one ability. If their main source of damage comes from Skill and Ultimate attacks, a Skill-focused badge can be much more useful.
Some damage effects can still be situational, so you should compare the badge effect with how the character actually plays.
Support Badge Guide
Support badges are easier to understand because their roles are more specific.
Antonio Badge is one of the strongest general options for healers because its effects improve healing-related performance. This makes it useful for characters whose main purpose is keeping the team alive.
Speedwagon Badge provides a shield at the beginning of the battle. This can be useful when your team needs extra protection against early burst damage.
Some useful combinations include:
- Antonio set + Speedwagon gems
- Speedwagon set + Antonio gems
If one of the two badges has a higher star level, consider using that badge as your main set because the additional base stats can be more valuable.
Other support badges have more specific effects. Wheel, for example, can be useful for Crowd Control-focused builds, while badges that reduce enemy Effect Resistance may become more valuable in PvP.
Tank Badge Guide
For tanks, two important options are Secco and San Viento.
Secco reduces the damage from a number of incoming hits. This can be especially useful when a tank is exposed to heavy burst damage at the start of a fight.
San Viento works differently. When the character falls below a certain HP threshold, it can provide HP recovery through the character’s next attack based on Defense.
Both options have their uses, so your available star levels should be an important part of the decision.
Possible combinations include:
- San Viento set + Secco gems
- Secco set + San Viento gems
If one set has significantly more stars than the other, it can make sense to use the higher-star badge as your main set and use the other effect through gems.
Gold Badge Goal for Tanks
Tank players should eventually consider working toward a Gold badge because the higher-level bonus can provide a major defensive improvement.
One of the valuable effects is the ability to reduce incoming damage while the character remains above a certain HP percentage. This can make a tank considerably harder to defeat while they are still healthy.
Reaching Gold requires a large investment, but it can be worthwhile for a tank that you use in most of your important content.
PvP Badge Guide
PvP changes the value of certain badges because effects such as Crowd Control, Energy reduction, and Effect Resistance become much more important against other players. Some badges worth considering for PvP include:
- Wheel Badge: Useful for Crowd Control-related effects.
- Taric Badge: Can help with debuff and Effect Resistance situations.
- Stroheim Badge: Offers more specialized PvP utility.
- Bucciarati Badge: Can reduce enemy Energy.
Bucciarati can be especially useful on an assassin targeting the enemy backline. Reducing the target’s Energy can delay their Ultimate, giving your assassin more time to eliminate them before they can use their strongest ability. Still, these badges are more specialized. If you are still building your account, it is generally better to focus on versatile PvE badges first.
Badges are much more than simple equipment in JoJo Golden Spirit. They can completely change how a character performs by adding stronger stats, set effects, gems, and higher-level perks.
For melee DPS, Kenzo is a reliable starting point, while Anubis and Akira can be used as additional options depending on the character’s Critical Rate and playstyle. Ranged DPS requires more attention to the character’s actual damage source, with Hol Horse being particularly useful for Basic Attack-focused characters.
For supports, Antonio and Speedwagon are strong general choices, while tanks can build around Secco and San Viento. PvP players can then look toward more specialized options such as Wheel, Taric, Stroheim, and Bucciarati.
Most importantly, do not spend your badge materials randomly. Decide which characters you use the most, identify their main role and damage source, and then build the badge set around them. This will help you get much more value from every promotion and gem you create.
JoJo Golden Spirit