


Anime Zero Potential Guide: Best Paths and Nodes for Maximum Damage
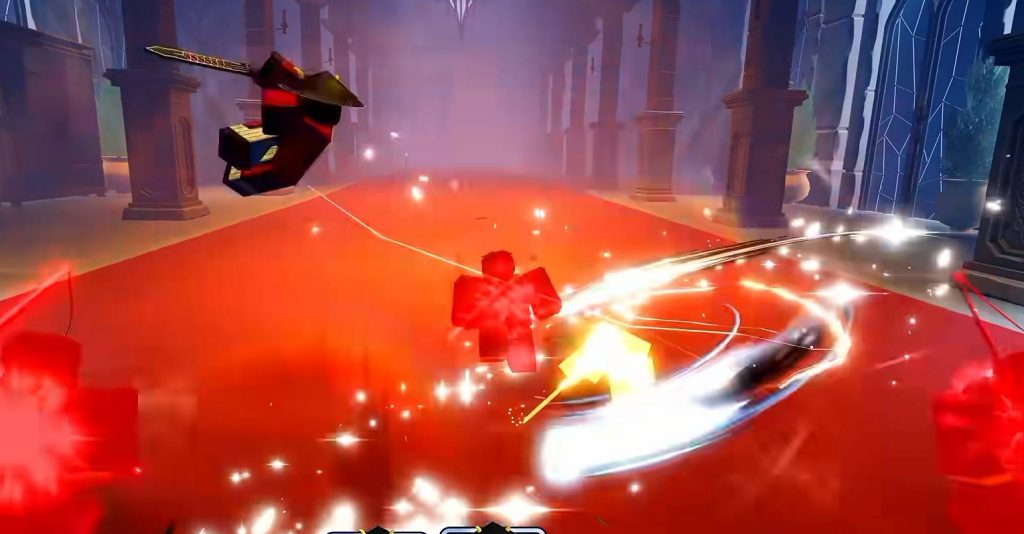
The Potential system in Anime Zero replaces the previous Skill Tree and introduces new ways to improve your units. With the level cap increased to 200, choosing the right paths and upgrades is important if you want to get the most damage out of your team. Each weapon can now specialize in different paths, allowing you to build around Echo, Burn, or Swap depending on its role.
This guide explains the recommended Potential paths and nodes for Y Zero, Astral Blossom, and other weapons. The main setup focuses on Echo Trigger for your primary damage dealer, Power Rush for your secondary unit, and Burn Blast for weapons built around Burn damage.
Important Rules Before Upgrading Potential
Before spending your Potential points, there are two important restrictions to understand. Each weapon can only follow one specialization path at a time, meaning you cannot combine two exclusive paths on the same weapon. However, your primary and secondary weapons can use different specializations, allowing you to create combinations that support your overall damage rotation.
You should also pay attention to nodes marked as Pick One. These upgrades are mutually exclusive, so selecting one option will permanently block the alternative within that specialization. Your choice can also affect which upgrades become available later, making it important to plan your route before investing points.
For the recommended setup, use these combinations:
- Y Zero: Echo with Echo Trigger for skill-based damage rotations.
- Astral Blossom: Swap with Power Rush to improve secondary weapon damage and support your main unit.
- Burn-focused weapons: Burn with Burn Blast for repeated damage detonations.
Best Echo Potential Path for Y Zero
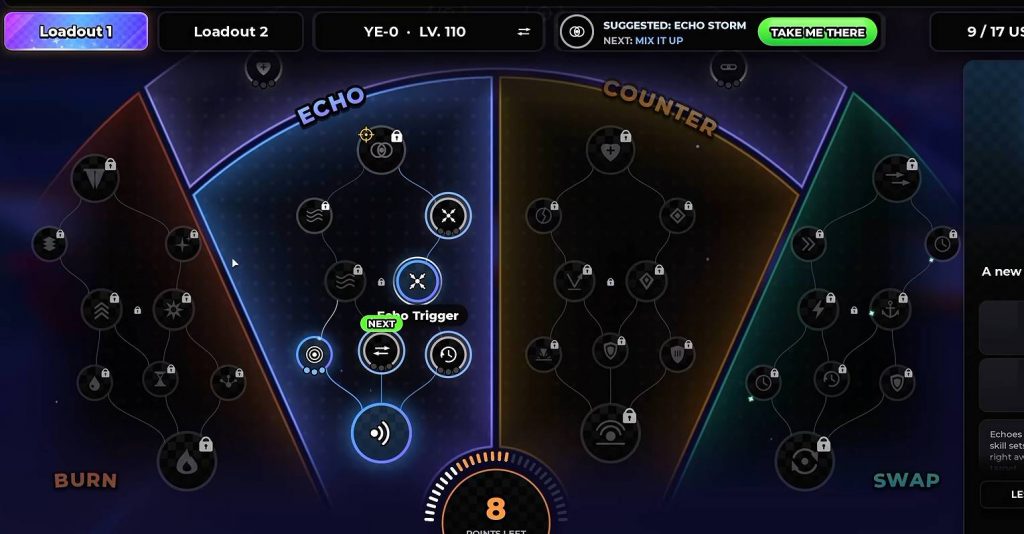
Echo is a strong choice for Y Zero because it rewards players who frequently use different skills during combat. Its main ability stores a portion of the damage dealt by eligible skills and releases that stored damage after a short delay. Since Echo does not affect ultimate attacks, you should focus on building a rotation around your regular skills to activate its effects consistently.
1. Echo and Loud Echo
Start by unlocking the main Echo power and investing in Loud Echo. The basic Echo effect stores 15% of the damage dealt by an eligible skill on its target. After the final hit, the stored damage normally activates after 1.2 seconds, giving you an additional source of damage without requiring another attack.
Loud Echo increases the stored damage percentage from 15% to 18% when fully upgraded. This should be your first priority because every additional Echo upgrade benefits from having a larger amount of damage stored.
2. Echo Trigger and Early Echo
When you reach the Pick One section, select Echo Trigger instead of Double Echo. This choice changes how your stored damage activates and provides a stronger result when used correctly. After selecting Echo Trigger, you will need to invest in Early Echo, which increases the damage of triggered Echoes by up to 70%.
Here is why this combination is recommended:
- Loud Echo stores 18% of eligible skill damage.
- Echo Trigger increases the stored damage by 70%.
- The final triggered Echo can deal damage equal to 30.6% of the original skill damage.
- Double Echo would provide a total of 23.4% instead.
For example, if one of Y Zero’s eligible skills deals 10,000 damage, a fully upgraded Echo Trigger setup can produce another 3,060 damage. The Double Echo alternative would provide 2,340 damage in comparison.
However, Echo Trigger requires proper timing. It allows stored Echoes to wait for up to three seconds, and the first hit from a different skill activates the waiting Echoes on that target. This effect has a three-second cooldown per target, so you should follow one skill with another before the stored Echoes expire.
3. Mix It Up and Quick Echo
After upgrading the main Echo damage nodes, invest in Mix It Up and Quick Echo. These upgrades improve your skill rotation by rewarding you for using different abilities and helping you recover cooldowns faster. They are especially useful when playing Y Zero as your primary damage dealer.
Their effects include:
- Mix It Up: Provides up to 7% additional damage to a skill when its first hit lands on an enemy that still has an Echo from a different skill.
- Quick Echo: Reduces the matching skill’s cooldown by up to 0.9 seconds when its Echo activates. This effect has a six-second activation cooldown.
Both upgrades work well with Echo Trigger because they encourage you to alternate between different skills instead of repeatedly using the same ability.
4. Echo Storm
Once you meet its requirements, unlock Echo Storm as another upgrade for your Echo setup. This node activates when you hit the same enemy with two different skills within four seconds, marking that target for five seconds. Your next basic attack against the marked enemy activates its remaining Echoes and reduces your last skill’s cooldown by 0.5 seconds.
Echo Storm can activate once every eight seconds. It is a useful addition to the build because it gives you another way to trigger stored damage while also providing a small cooldown reduction.
Recommended Echo path:
- Unlock Echo.
- Max Loud Echo.
- Select Echo Trigger.
- Max Early Echo.
- Upgrade Mix It Up and Quick Echo.
- Unlock Echo Storm when available.
This is the recommended route for Y Zero if you want to focus on frequent skill usage and maximize Echo damage.
Best Burn Potential Path for Damage Weapons
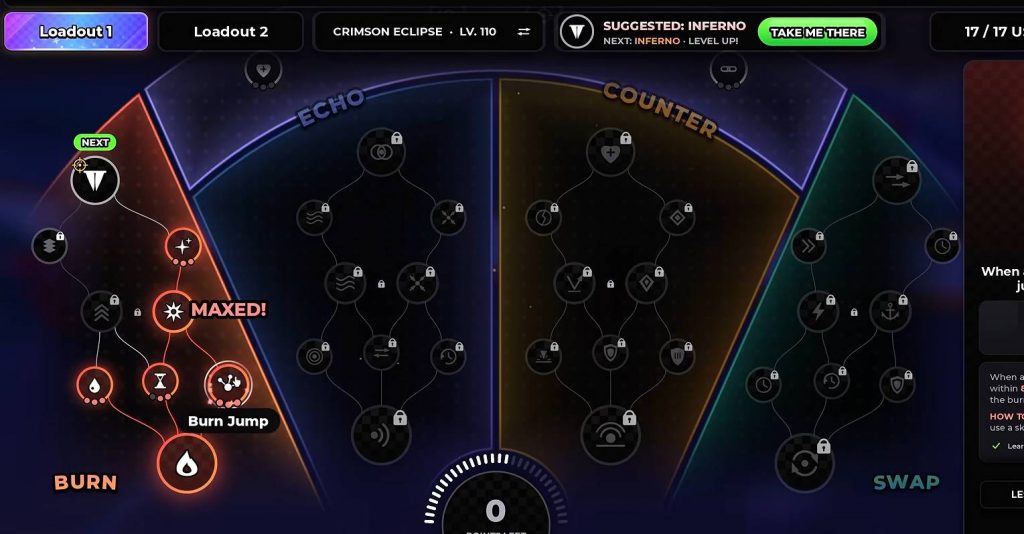
Burn is another strong Potential specialization, particularly for weapons that can repeatedly hit enemies with skills. Its main mechanic applies damage over time, allowing you to deal additional damage after your initial attacks. For this build, Burn Blast is the recommended Pick One option because it lets your skills detonate the remaining Burn damage before the effect finishes ticking.
1. Burn and Hotter Burn
Start by unlocking the main Burn power and maxing Hotter Burn. Every hit applies Burn damage that continues over three seconds. Hotter Burn increases the base Burn damage from 8% to 11% of the original hit’s damage when fully upgraded.
This upgrade is important because the entire specialization depends on applying Burn consistently. Increasing its base damage gives you more damage to work with when using Burn Blast later in the build.
2. Burn Blast and Mega Blast
At the Pick One section, choose Burn Blast instead of Burn Stack. Burn Blast allows your skill hits to detonate the remaining Burn damage on an enemy, with an activation limit of once every 0.5 seconds per target. This makes it especially effective for weapons that can use skills frequently.
After selecting Burn Blast, focus on maxing Mega Blast. At maximum rank, this upgrade makes detonations deal 100% additional damage based on the Burn damage still remaining on the target.
For example, if an enemy has 1,000 Burn damage waiting to be applied, a fully upgraded Mega Blast can turn that remaining damage into a 2,000-damage detonation. The bonus only applies to the remaining Burn damage, so the final result depends on how much damage has already been dealt through the normal Burn ticks.
This is why Burn Blast works well with aggressive skill rotations. You can keep applying Burn and use another skill to detonate the remaining damage before the effect expires.
3. Inferno
After completing the main Burn Blast upgrades, work toward unlocking Inferno. This node rewards you for maintaining Burn on an enemy over an extended period. You need to keep the target burning for six seconds without allowing more than three seconds to pass between new Burn applications.
Once Inferno activates, your attacks against that enemy deal 4% additional damage while it remains burning and for four seconds after the Burn effect ends. This makes it useful for longer fights where you can consistently maintain the effect.
Longer Burn duration also helps keep your damage bonuses active. As a result, maintaining regular skill usage is important if you want to benefit from Inferno throughout a fight.
4. Longer Burn and Burn Jump
After securing the main damage upgrades, you can invest in Longer Burn and Burn Jump. These nodes provide additional value by extending Burn-related effects and helping spread damage between nearby enemies.
Burn Jump is particularly useful when fighting groups. At maximum rank, an enemy defeated while burning transfers 50% of its remaining Burn damage to up to three nearby enemies within eight studs. The transferred damage is then dealt over 1.5 seconds.
Recommended Burn path:
- Unlock Burn.
- Max Hotter Burn.
- Select Burn Blast.
- Max Mega Blast.
- Unlock Inferno when its requirements are met.
- Invest in Longer Burn and Burn Jump.
For this setup, the most important part of combat is keeping enemies affected by Burn and using skills frequently enough to detonate the remaining damage. This is particularly effective against enemies that survive multiple skill attacks.
Best Swap Potential Path for Astral Blossom
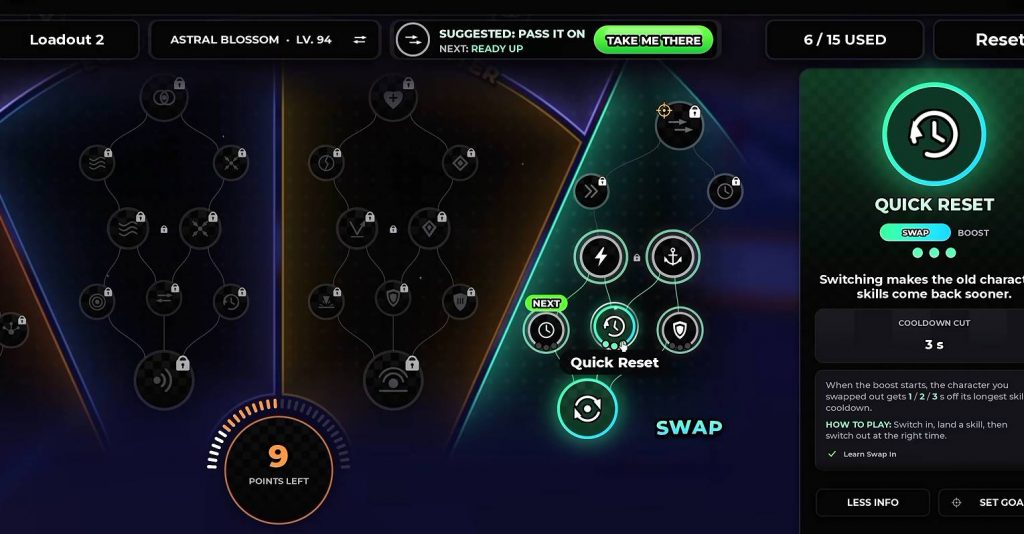
Swap is designed for players who frequently switch between their primary and secondary units during combat. Instead of keeping your secondary weapon active for the entire fight, you can bring it out to use its abilities, activate a temporary damage boost, and then return to your main damage dealer. For this build, Astral Blossom uses Power Rush while Y Zero remains your primary weapon.
To use this specialization, you need at least two different units equipped. Switching to your secondary unit prepares the Swap In effect, but the damage bonus does not activate immediately. You must land a skill hit within the activation window to trigger the boost.
The base Swap In effect provides 22% additional damage for six seconds and can activate once every 10 seconds.
1. Swap In and Quick Reset
Start by unlocking Swap In and maxing Quick Reset. This upgrade reduces the longest skill cooldown of the character you switched away from by three seconds when the Swap In boost activates.
For example, when switching from Y Zero to Astral Blossom, activating the boost will reduce the longest cooldown on Y Zero. This helps your primary weapon recover an important ability while you are using your secondary unit.
Quick Reset is especially useful for rotations that involve briefly switching to Astral Blossom before returning to Y Zero for another damage window.
2. Power Rush and Bigger Rush
At the Pick One section, choose Power Rush instead of Long Rush. Power Rush focuses on providing a stronger damage boost over a shorter period, making it a better option for players who want to use their secondary unit and quickly return to their main weapon.
After selecting Power Rush, max Bigger Rush to increase the damage bonus to 55% for four seconds.
The difference between the two options is their duration and damage focus:
- Power Rush: Provides up to 55% additional damage for four seconds with Bigger Rush.
- Long Rush: Offers a 20% damage bonus that can last up to 15 seconds with its upgrades and extensions.
Power Rush is the recommended choice for the Astral Blossom setup because the goal is to activate its damage boost, use the secondary unit’s abilities, and switch back to Y Zero.
3. Ready Up and Safe Entry
Once Quick Reset and Bigger Rush are upgraded, invest in Ready Up and Safe Entry while working toward the final Swap node. These upgrades make it easier to activate your temporary damage boost and provide some protection during the switching process.
Their effects are:
- Ready Up: Extends the window for landing the skill hit that activates the Swap In boost by up to seven seconds.
- Safe Entry: Provides up to 16% damage reduction for three seconds after the boost activates.
Ready Up is particularly important if your secondary unit needs more time to position itself before landing a skill. Safe Entry is useful when switching during combat because it gives you a short defensive bonus.
4. Pass It On
Pass It On is the main objective of this Swap build. To unlock it, you need to select a Pick One specialization and invest 15 points into Swap. Once available, this node allows you to transfer a damage bonus to the character that enters the field after your current Swap boost activates.
To trigger Pass It On, follow these conditions:
- Activate your Swap In damage boost.
- Land a hit while the boost is active.
- Switch to another character before the boost expires or within two seconds after it ends.
- Your incoming character receives 12% additional damage for three seconds.
Keep in mind that the 55% Power Rush bonus and the 12% Pass It On bonus are separate effects. Power Rush benefits the unit using the active boost, while Pass It On gives the incoming character its own damage bonus.
For the recommended setup, use Y Zero as your main weapon and Astral Blossom as your secondary unit. Switch to Astral Blossom, land a skill hit to activate Swap In, and then return to Y Zero within the required window. Your main weapon can then take advantage of the Pass It On damage bonus.
Recommended Swap path:
- Unlock Swap In.
- Max Quick Reset.
- Select Power Rush.
- Max Bigger Rush.
- Upgrade Ready Up and Safe Entry.
- Invest 15 points in Swap.
- Unlock Pass It On.
This route gives Astral Blossom a strong temporary damage boost while also helping Y Zero recover its cooldowns and gain additional damage when returning to the field.
Additional Potential Upgrade: Combo Power
If you have extra Potential points available, Combo Power is another upgrade worth considering. It rewards you for completing a basic attack combo before using a skill, increasing the damage of your next ability. The bonus starts at 8%, making it a useful shared damage improvement for builds that regularly mix basic attacks and skills.
Try to complete your basic attack combo before using your important damage abilities. This allows you to benefit from Combo Power without making major changes to your existing Echo, Burn, or Swap rotations.
Best Anime Zero Potential Build Summary
For maximum damage with the recommended Y Zero and Astral Blossom combination, you should use different Potential specializations on each weapon. Echo Trigger is the main damage path for Y Zero, while Astral Blossom benefits from Power Rush and Pass It On. Burn Blast is better suited for another weapon that can consistently apply and detonate Burn effects.
Here is the recommended setup:
- Y Zero: Echo, Loud Echo, Echo Trigger, Early Echo, Mix It Up, Quick Echo, and Echo Storm.
- Astral Blossom: Swap In, Quick Reset, Power Rush, Bigger Rush, Ready Up, Safe Entry, and Pass It On.
- Burn-focused weapon: Burn, Hotter Burn, Burn Blast, Mega Blast, Inferno, Longer Burn, and Burn Jump.
- Extra damage upgrade: Combo Power, especially if you regularly complete basic attack combos.
Remember that these builds rely on activating their conditions correctly. With Echo, alternate between different skills to trigger stored damage. With Burn, keep applying the effect and detonate it before the remaining damage disappears. With Swap, land a skill hit before switching back to your primary weapon. Using the right paths is only part of the setup. You also need to follow the correct combat rotation to get the full value from each Potential upgrade.
Jujutsu Zero