


Multiversal Piece Beginner Guide: Best Progression Route from Early Game to Endgame
Starting your adventure in Multiversal Piece on Roblox can feel confusing because the game has many systems, islands, abilities, and upgrades to explore. New players might not know which features deserve attention first or how to build a character strong enough to defeat later bosses.
The best approach is to focus on your early-game build before chasing rare abilities. Start by getting a useful Fruit, leveling up, improving your Race and Trait, and unlocking Haki. Once you have enough damage and survivability, you can begin farming powerful characters like Shinra, Yuji, Sukuna, and eventually Muna. This guide covers a recommended progression route to help beginners avoid wasting their resources.
1. Redeem Codes and Get a Good Starting Fruit
Before doing anything else, check whether Multiversal Piece has any active redeem codes. Codes can provide useful rewards that make early progression easier. However, there were no working codes available at the time covered by the original guide, so keep an eye out for future releases.
After checking the codes, focus on getting a decent Fruit. You do not need to chase the rarest option immediately because your main objective is to find something that makes farming enemies and completing quests easier.
These are some of the recommended Fruits for beginners:
- Ice Fruit: A good option for early progression and the recommended starting choice.
- Light Fruit: Another strong option if you manage to obtain it.
- Flame Fruit: A useful alternative for leveling and fighting enemies.
Once you have a Fruit that suits your playstyle, start completing quests on Starter Island. Focus on gaining levels instead of spending too much time trying to obtain every rare item at the beginning.
2. Use Auto Stats and the Wiki Button

Multiversal Piece has several features that can make leveling easier, especially if you are still learning how its progression system works. One useful option is Auto Stats, which automatically distributes your available stat points.
You can find this feature through the menu. If you do not want to manage every stat manually, simply enable it and let the game handle the distribution.
There is also a purple Wiki button that beginners should use regularly. It provides information about important NPCs on different islands, including the level requirements needed to continue progressing. This can help you figure out where to go next without wasting time searching every island.
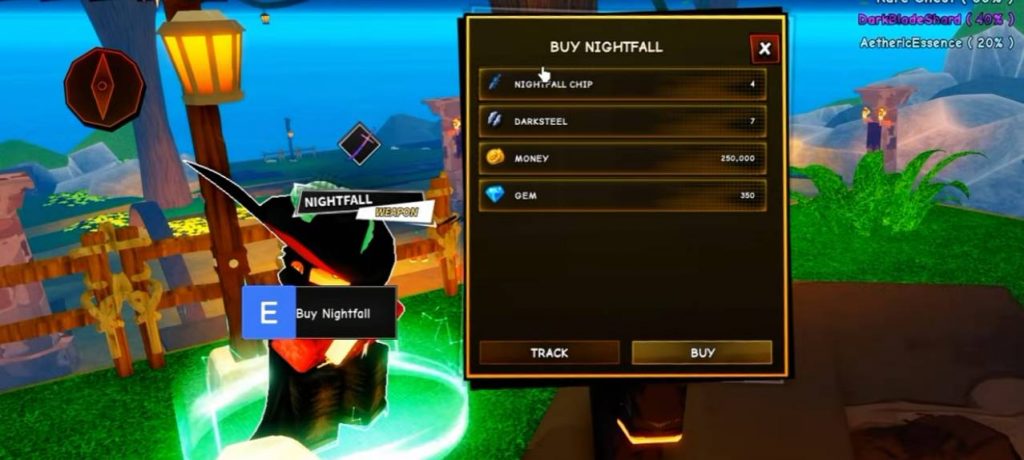
Once you reach the required level, move toward Jungle Island and continue your progression there. You can also start working toward Nightblade, which is a useful weapon upgrade for dealing with stronger enemies later.
3. Choose a Good Race and Trait
Your Race and Trait can have a noticeable impact on your character’s performance. You can roll for these options at Solo Leveling Island, while additional rolls can be purchased from the shop on Starter Island.
For beginners, one Race worth keeping is Nocturn. Its Lifesteal effect helps restore your health during combat, which can be especially useful when fighting bosses that deal heavy damage.
Celestial is another desirable option if you manage to get it, but do not feel pressured to keep rolling until you obtain the rarest Race. Nocturn is already a useful choice for early progression.
Traits are also important, but you should be careful with your rerolls. Legendary and Mythical Traits can be valuable, but spending all your resources trying to get one at the beginning is not a good idea.
Instead, keep a Trait that provides useful benefits and save your resources for other upgrades. You can optimize your build further once you reach the later stages of the game.
4. Unlock Armament and Observation Haki
After reaching the required level, you should start working toward unlocking both types of Haki: Armament Haki and Observation Haki.
These abilities are important upgrades for your character, so it is better to unlock them early instead of leaving them until the endgame. Visit the NPCs responsible for these abilities and accept their respective quests.
Once you have accepted the quests, you can track your objectives through the quest tracker in the top-right corner of the screen. Complete the required tasks to unlock each Haki.
However, unlocking them is only the first step. You should continue upgrading both abilities as you level up. Visit their NPCs to check the requirements for the next upgrades.
You can also enable Auto Use through the settings. This makes it easier to use your Haki abilities without constantly activating them manually.
5. Work Toward Shanks Blade and Upgrade Your Skill Tree
Another weapon worth obtaining during progression is Shanks Blade. This weapon becomes useful for certain builds later in the game, especially when you start working toward stronger abilities and boss fights.
You do not need to stop your entire progression just to obtain it immediately. Keep it as one of your important upgrade goals while completing quests and leveling up.
You should also visit the Skill Tree on Starter Island regularly. As you gain Skill Points, make sure to spend them on upgrades that support your current build.
Leaving too many points unused can make fights harder than necessary. Focus on upgrades that improve your damage and overall combat performance so you can defeat stronger enemies more efficiently.
6. Use Stellarite for the Gacha Banner

Stellarite is another resource you will collect while playing Multiversal Piece. You can spend it on the Gacha Banner located on Starter Island to roll for different rewards.
Some of the possible rewards mentioned include:
- Hikari
- Nine-Tailed Fox
Getting one of these powerful options early could help your progression, but remember that the banner is based on RNG. There is no guarantee that you will receive the exact reward you want.
My recommendation is to prioritize your essential upgrades before spending too much Stellarite on summons. Once your character has a decent build, you can start using your extra resources on the banner.
You should also check the Index system because completing entries can provide additional Stellarite rewards.
7. Get Shinra by Defeating His Boss
Once your character has a decent build, you can start working toward more powerful abilities. One of the first major targets is Shinra.
To obtain Shinra, you need to spawn his boss and defeat it. Make sure your character has enough damage and survivability before attempting the fight, especially if you are still using an early-game setup.
This is a good point in your progression to start testing your build against stronger enemies. If you struggle to defeat the boss, spend some time improving your stats, Haki, weapon, and Trait before trying again.
8. Obtain Yuji Itadori in Shibuya Island
Your next major target should be Yuji Itadori, which can be obtained through the progression system on Shibuya Island.
You will need several materials to unlock him. Some of these come from specific enemies, while others can be obtained through Material Boxes.
Here are the materials and their sources:
- Hex Shard: Drops from Cursed Warden or Material Box 3.
- Hex Mark: Drops from Grade 2 Sorcerer or Mythical Material Box.
- Soul Residue: Can be obtained from Material Box 2 or Material Box 3.
- Flash Spark: Drops from Cursed Executioner.
- Crown Shard: Has a 1% drop chance from Shibuya enemies or can be obtained from Sukuna bosses.
Since some materials have low drop rates, you may need to defeat the same enemies several times before collecting everything.
Yuji is an important part of the recommended progression route because he will help you work toward obtaining Sukuna. It is worth collecting his materials before moving on to the next major target.
9. Prepare Your Build Before Farming Sukuna
After obtaining Yuji Itadori, you can start preparing for Sukuna. However, there are a couple of different ways to approach this part of progression.
The first option is to use Yuji together with Shanks Blade. This is a straightforward setup if you have already followed the earlier steps and collected both of them.
Another option is to obtain Stark first. This can be useful if your current build does not deal enough damage to handle certain bosses comfortably.
You do not need to collect every powerful ability before moving forward. Choose the route that works best with your current equipment and damage output.
The main goal is to create a build that can defeat the enemies required for Sukuna’s materials without making every fight unnecessarily difficult.
10. How to Get Sukuna
Sukuna is one of the major goals in the recommended progression route. Obtaining him requires several materials, and you will need to spend some time farming enemies and opening Material Boxes.
Material Boxes can be obtained from chests and certain enemies, including:
- Cursed Warden
- Cursed Executioner
- Sukuna boss
Since multiple materials can come from these sources, farming them regularly is a good way to make progress toward Sukuna.
Once you have collected the required items, you can work toward obtaining Sukuna V1. After unlocking the first version, you can begin the next stage of his progression.
11. Complete Sukuna V2 and Unlock Muna
After obtaining Sukuna V1, your next objective is to complete the V2 questline. To start, find the Muna NPC and interact with them.
This NPC will teleport you to the special questline area, where you need to follow the instructions and complete the required objectives.
Eventually, you will have to fight Maguna. This battle has multiple phases, so make sure you understand its mechanics before attempting it.
A few things to remember during the fight:
- Keep dealing damage to progress through the different phases.
- Watch your health because the boss can be dangerous.
- Look for Health Potions that spawn around the arena.
- Pick up the potions when necessary instead of risking defeat with low HP.
After completing the required fight and ritual, you can unlock Muna’s power. Additional requirements may be needed to obtain advanced abilities such as Domain Expansion and Maharaga.
This is one of the major endgame goals in the recommended progression route. You can also work toward Gojo, but focusing on the Sukuna and Muna path first provides a clear direction for your character development.
12. Start Doing Dungeons for Glyphs and Advanced Upgrades
Dungeons are another important activity in Multiversal Piece. One of the main reasons to complete them is to obtain Glyphs, which can improve your character’s damage.
If you are new to the dungeon system, start with Easy difficulty. There is little reason to jump straight into Extreme when your build is not ready, as stronger enemies can make the experience unnecessarily difficult.
Once you have better equipment and understand the dungeon mechanics, you can gradually try the harder difficulties.
Dungeons are also connected to more advanced progression systems, including:
- Glyphs: Upgrades that can help increase your damage.
- Transcend Core: An advanced progression upgrade to work toward later.
- Passives: Additional bonuses that can improve your character’s overall performance.
You do not need to worry about all these systems immediately. Build a strong character first, then start farming dungeons to improve your performance further.
13. Complete the Index for Extra Stellarite
The Index is another system that beginners should not ignore. As you obtain different Specs and Elements, you will gradually fill out your collection and make progress toward completing Index entries.
One useful reward from this system is additional Stellarite. This gives you another way to collect the currency needed for the Gacha Banner without relying entirely on regular farming.
Whenever you unlock a new Spec or Element, check your Index to see whether you have received any rewards. It is an easy system to overlook, but the extra Stellarite can be useful when you are trying to obtain more abilities.
14. Fishing Guide: How to Farm While AFK
Fishing is one of the side activities available in Multiversal Piece. Unlike regular combat, this system gives you another way to collect rewards without constantly fighting enemies.
To start fishing, head to the shore of any island and spawn a normal boat. Move the boat away from the coast and out into the sea, where you can begin fishing.
You can also upgrade your Fishing Rod to improve your fishing setup. Once everything is ready, you can leave your character fishing and use the activity as an AFK farming option.
This is worth doing when you want to collect resources while focusing on something else. Just remember to upgrade your rod as you make progress so you can improve your fishing setup.
15. How to Use the Garden
The Garden is located on Jungle Island and offers another way to collect rewards over time. To use it, you first need to obtain Fruits and store them before planting.
Once you have the Fruits you want to use, head to the Garden and plant them. They will grow over time and provide rewards later.
This system is worth checking whenever you visit Jungle Island. Instead of focusing entirely on combat and leveling, you can use the Garden to work toward additional rewards while continuing your main progression.
16. Mining Location
Mining is another side activity available in Multiversal Piece. Unlike the Garden, which is located on Jungle Island, you can find the mining area on Cave Island.
If you want to explore the game’s additional systems, make sure to visit Cave Island and check the available mining features. It is another activity to keep in mind alongside fishing and gardening.
Multiversal Piece has many systems, and trying to understand everything at once can make the early game confusing. The easiest way to progress is to focus on your Fruit, levels, Race, Trait, Haki, and weapons before chasing powerful endgame abilities.
Once your build is strong enough, start working toward Shinra, Yuji, Sukuna, and Muna. Dungeons and the other side activities can help you improve your character even further. Take your time with each upgrade instead of spending all your resources on random rolls, and you will have a much clearer path from beginner to endgame.
Multiversal Piece